Growing your own potatoes at home can be a rewarding and enjoyable experience. A convenient and space-saving method is growing potatoes in bags. This method allows you to grow delicious, fresh potatoes even if you have limited outdoor space. In this step-by-step guide, we’ll walk you through the process of growing potatoes in bags, from choosing the right variety to harvesting your homegrown potatoes.

Step 1: Choose the Right Potato Variety: Choosing the right potato variety is crucial for successful growth. There are three main categories of potatoes: early, cover, and late. When growing in bags, opt for early or mid-season varieties, as these generally thrive in tight spaces. Popular options include Yukon Gold, Red Norland, and Kennebec.
Step 2: Gather supplies:
- Seed potatoes (small whole potatoes or larger ones cut into pieces with at least 2 eyes each)
- Large, sturdy bags (fabric grow bags or reusable shopping bags work well)
- High-quality potting soil or a mixture of potting soil and compost
- Fertilizer (balanced NPK fertilizer)
- water source
- Sunny location
Step 3: Prepare the seed potatoes: If using larger seed potatoes, cut them into chunks, ensuring each chunk has at least two eyes (small indentations from which sprouts grow). Let the cut chunks air dry for a day to prevent rotting.
Step 4: Prepare the bags: Place the bags in a sunny location where they receive at least 6–8 hours of direct sunlight daily. Fill the bags with a few inches of potting soil to create a base for the potatoes.
Step 5: Planting: Place 3-4 seed potato pieces (or whole small potatoes) evenly spaced in each bag on the soil. Cover the potatoes with about 10 cm of soil.
Step 6: Initial Growth: Keep the soil evenly moist, but not soggy, as the potato plants grow. Once the plants reach a height of about 15 cm, add more soil to cover the lower stems, leaving only the upper leaves exposed. This encourages the development of more tubers along the buried stems.
Step 7: Fertilization: After the plants have grown for approximately 4–6 weeks, begin fertilizing with a balanced NPK fertilizer according to the package instructions. This will provide the necessary nutrients for healthy growth and tuber development.
Step 8: Continuous Care: Check the bags regularly for watering needs and ensure the plants receive adequate sunlight. Protect the plants from pests by regularly inspecting them and taking appropriate measures if problems arise.
Step 9: Flowering and tuber formation: About 8–10 weeks after planting, the potato plants will begin to flower. This signals that tubers are forming underground. Continue watering and nurturing the plants.
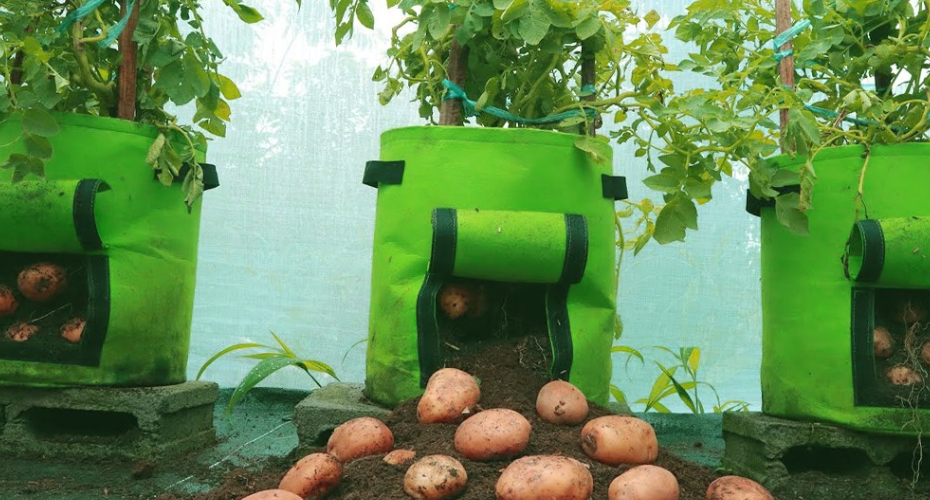
Step 10: Harvest: Potatoes are usually ready to harvest when the plants begin to die back and the foliage turns yellow and withers. Carefully dig into the soil to harvest the potatoes. If you want smaller “new” potatoes, you can harvest a few weeks earlier.
Step 11: Enjoy your harvest: After harvesting, let the potatoes air dry for a few hours. Store them in a cool, dark place to extend their shelf life. Enjoy the satisfaction of eating your homegrown potatoes!
Bottom line: Growing potatoes at home in bags is an excellent way to produce fresh, flavorful potatoes, even when space is limited. By following this step-by-step guide, you can successfully grow your own potatoes and experience the joy of harvesting and enjoying your homegrown produce. Happy potato gardening!
Do you like this? Share inspiration with your friends!

