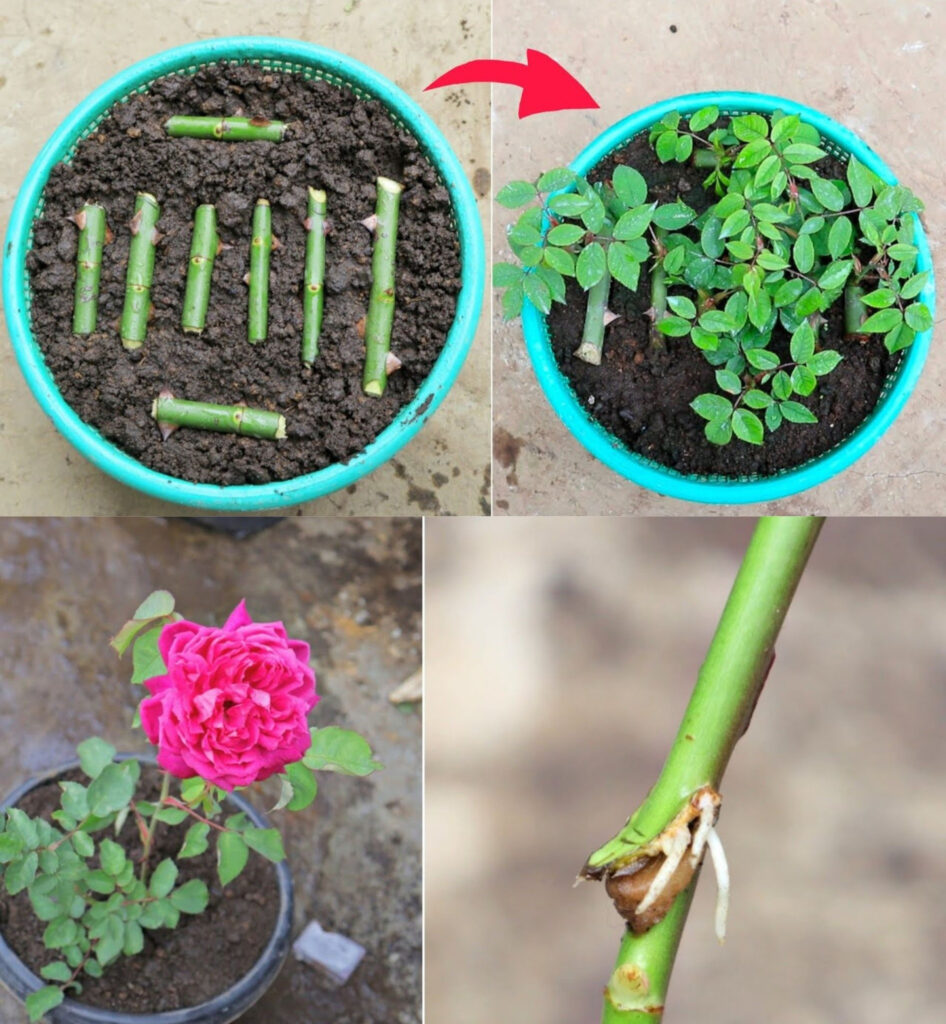
Propagating roses using potatoes is a unique and effective method that can help provide the necessary nutrients and moisture to the rose cuttings, promoting quick rooting. Here’s a step-by-step guide on how to do it:
Materials Needed:
- Healthy rose cuttings (6-8 inches long)
- Medium-sized potatoes
- A sharp knife or pruning shears
- A drill or a thick nail
- Potting soil or garden bed
- A small container or plastic bag
- Rooting hormone (optional)
- Water
Step-by-Step Instructions:
1. Prepare the Rose Cuttings
- Select Healthy Stems: Choose healthy rose stems that are about 6-8 inches long. Ensure the stems have at least a few leaves and nodes.
- Cut the Stems: Using a sharp knife or pruning shears, cut the stems at a 45-degree angle just below a node. Remove any flowers and most of the leaves, leaving just a couple at the top.
- Optional Rooting Hormone: Dip the cut end of each stem into rooting hormone powder if you have it. This can increase the chances of successful rooting.
2. Prepare the Potatoes
- Choose the Potatoes: Select medium-sized potatoes that are firm and free of disease or rot.
- Drill a Hole: Using a drill or a thick nail, make a hole in each potato that is slightly smaller than the diameter of the rose cutting. The hole should be deep enough to hold the cutting securely.
3. Insert the Rose Cuttings into Potatoes
- Insert into Potato: Gently push the cut end of each rose cutting into the hole you made in the potato. Ensure that the cutting is firmly in place and standing upright.
4. Plant the Rose and Potato Combination
- Prepare the Soil: Fill a pot with well-draining potting soil, or prepare a garden bed with loose, nutrient-rich soil.
- Plant the Combination: Dig a hole in the soil and plant the potato with the rose cutting attached. Make sure the potato is completely buried in the soil and the cutting is upright.
- Watering: Water the soil thoroughly after planting. Keep the soil consistently moist but not waterlogged.
5. Create a Humid Environment
- Cover for Humidity: If desired, cover the cutting with a plastic bag or a small container to create a humid environment. This can help the cutting develop roots. Ensure there is some airflow to prevent mold.
- Sunlight: Place the pot or garden bed in a location where the cutting will receive indirect sunlight. Avoid direct harsh sunlight until the cutting has established roots.
6. Monitor and Care
- Monitor Growth: Over the next few weeks, monitor the cutting for signs of growth. Keep the soil moist and ensure the cutting remains healthy.
- Transplanting: Once the rose cutting has developed a strong root system (this can take several weeks to a few months), you can transplant it to its permanent location in your garden.
Tips for Success:
- Healthy Cuttings: Ensure you start with healthy, disease-free rose cuttings for the best chance of success.
- Right Season: Late spring or early summer is an ideal time for propagating roses.
- Patience: Rooting rose cuttings can take time, so be patient and continue to care for the cuttings properly.
- Consistent Moisture: Keep the soil consistently moist but avoid waterlogging, which can cause rot.
Using potatoes to propagate rose cuttings is an innovative and natural method that provides the cuttings with moisture and nutrients, encouraging quicker root development. This method is easy to do at home and can be a rewarding way to expand your rose garden.

